Bites & Pieces: Barks and Bostons Edition

We bought Pinta from the Daisy Hill Puppy Farm last December. Just kidding–it was Howling Hill Kennel, a local breeder of small small breed dogs (Bostons and Pugs). I appreciated the advice regarding rescue dogs from NoVA and, I think Goose. Sadly, the local links ranged as far as N. Carolina and so there were very few Bostons available in this area.

Pinta means painted or spotted in Spanish. The name fit for a Boston Terrier. She’s actually named for a rice and beans dish from Central America called Gallo Pinto (spotted rooster). As ours is a female, the appropriate name was Pinta. All we need to do is pick up a boy, who will of course be called Gallo. Well, that or Bilbo. I figure hobbit names work well for small dogs.

Pinta came home from the kennel with a bag of kibble (which we later determined is Costco’s small breed dog food). We had been feeding her that for the first 7 months we had her along with treats. Then we went to Costa Rica for several weeks. A friend of ours cared for her until I returned. As part of caring for Pinta, she fed her a canned dog food to keep her happy. I returned on my own for four weeks. There were a number of containers left, so I took to giving Pinta a bit in the morning when I left and a bit more in the evening when I came back home. Then I ran out…

What to do? I didn’t want to buy a bunch of expensive dog food and it struck me that it’s something one could make. I hit the web and looked through a few recipes. This was going to be a supplement to her main diet, so I wasn’t worried about making a complete food. Just something that would be a bit of a treat when I left in the morning, but one that is nutritionally appropriate.

It takes a couple of hours to make, but there’s not much active work and one batch makes enough to last for a couple of months. The essentials are meat, rice, and veggies. I went with chicken for the meat. Chicken quarters are inexpensive and the bones are useful for making stock. I suppose I could break down whole chickens and save the breast meat for human food.

I got mixed messages regarding rice. Brown rice is good, because it has additional nutrients. No no no. Brown is bad, because it’s harder to digest. I split the difference in the end. I used a sweet brown rice (the bag your own bin at Whole Foods), but I cook it an extra step. I’m a fan of risotto, so I thought that might work. I cook the rice in our rice cooker and then cook it further with chicken stock so that it gets a risotto like texture. For veggies, I use carrots and peas. Onions are verboten as they can be toxic to dogs. I don’t use a commercial stock as onions are certain to be used and I’d rather not deal with doggie indigestion.Although this isn’t our dog’s primary food, I add a vitamin supplement and some Omega 3 oil. Once everything is mixed together, I freeze it in one cup portions. I can transfer one down to the fridge in the evening and it’ll be defrosted by morning. On days when she’s alone, I give Pinta about 1/3 cup when I leave in the morning and a similar amount in the evening.

The basic approach works pretty well with other proteins. I was cooking salmon recently and had some trimmings after I made filets. That made a nice small batch of Pinta food. Likewise, I had a chuck roast that I used for a Trieste goulash. Grind the smaller pieces and use them for a beef based version of this dish.

Ingredients

Five pound bag of chicken leg and thigh quarters

Two cups chopped or shredded carrots

One pound bag of frozen peas, defrosted

Two cups of sweet brown rice

Nutritional supplements

Method

1. Cook rice. I put rice and three cups of water in a rice cooker and let the machine do the work.

2.  Remove skin from chicken quarters and separate meat from bone. Make stock from the bones, ~6 cups of water, several stalks of celery and a couple of carrots. Do not use onions as these are slightly toxic to dogs. Bring up to a boil and simmer, uncovered, for about an hour. You should get about four cups of stock. Strain and return to pot.

3. Use a meat grinder or food processor to make ground chicken. If using a food processor, cut the chicken into large pieces (1” – 2”) and put in freezer for 15 minutes. This is a method I use for ground beef (taken from Cooks Illustrated).

4. Add a bit of oil to a large, heavy bottomed pot and heat slightly. Add the ground chicken and cook, stirring occasionally, for a few minutes. No need to cook it completely, just take an edge off the rawness. Add the carrots and peas, stir and add a couple cups of hot broth. It’s not a bad idea to defrost the peas in the microwave and chop in the food processor.

5. When the rice is done, add to the pot with the remaining two cups of broth. Simmer until the broth is absorbed. You’re going for a risotto like consistency. I read conflicting information about digesting brown rice, so decided to break it down further. Whole Foods has sweet brown rice, which is short grain and hence suitable for this kind of dish.

6. Add the softened rice to the chicken and vegetables and stir. Cook uncovered until the broth is mostly absorbed. Stir in nutritional supplement. These vary quite a bit, so use your judgement as to the right amount. I use a combination of a NutriVet and Omega 3 oils.

This makes about four quarts of dog food. I freeze in one cup quantities. Move to the refrigerator the day before and it defrosts nicely. I reheat to room temperature in the microwave before serving.
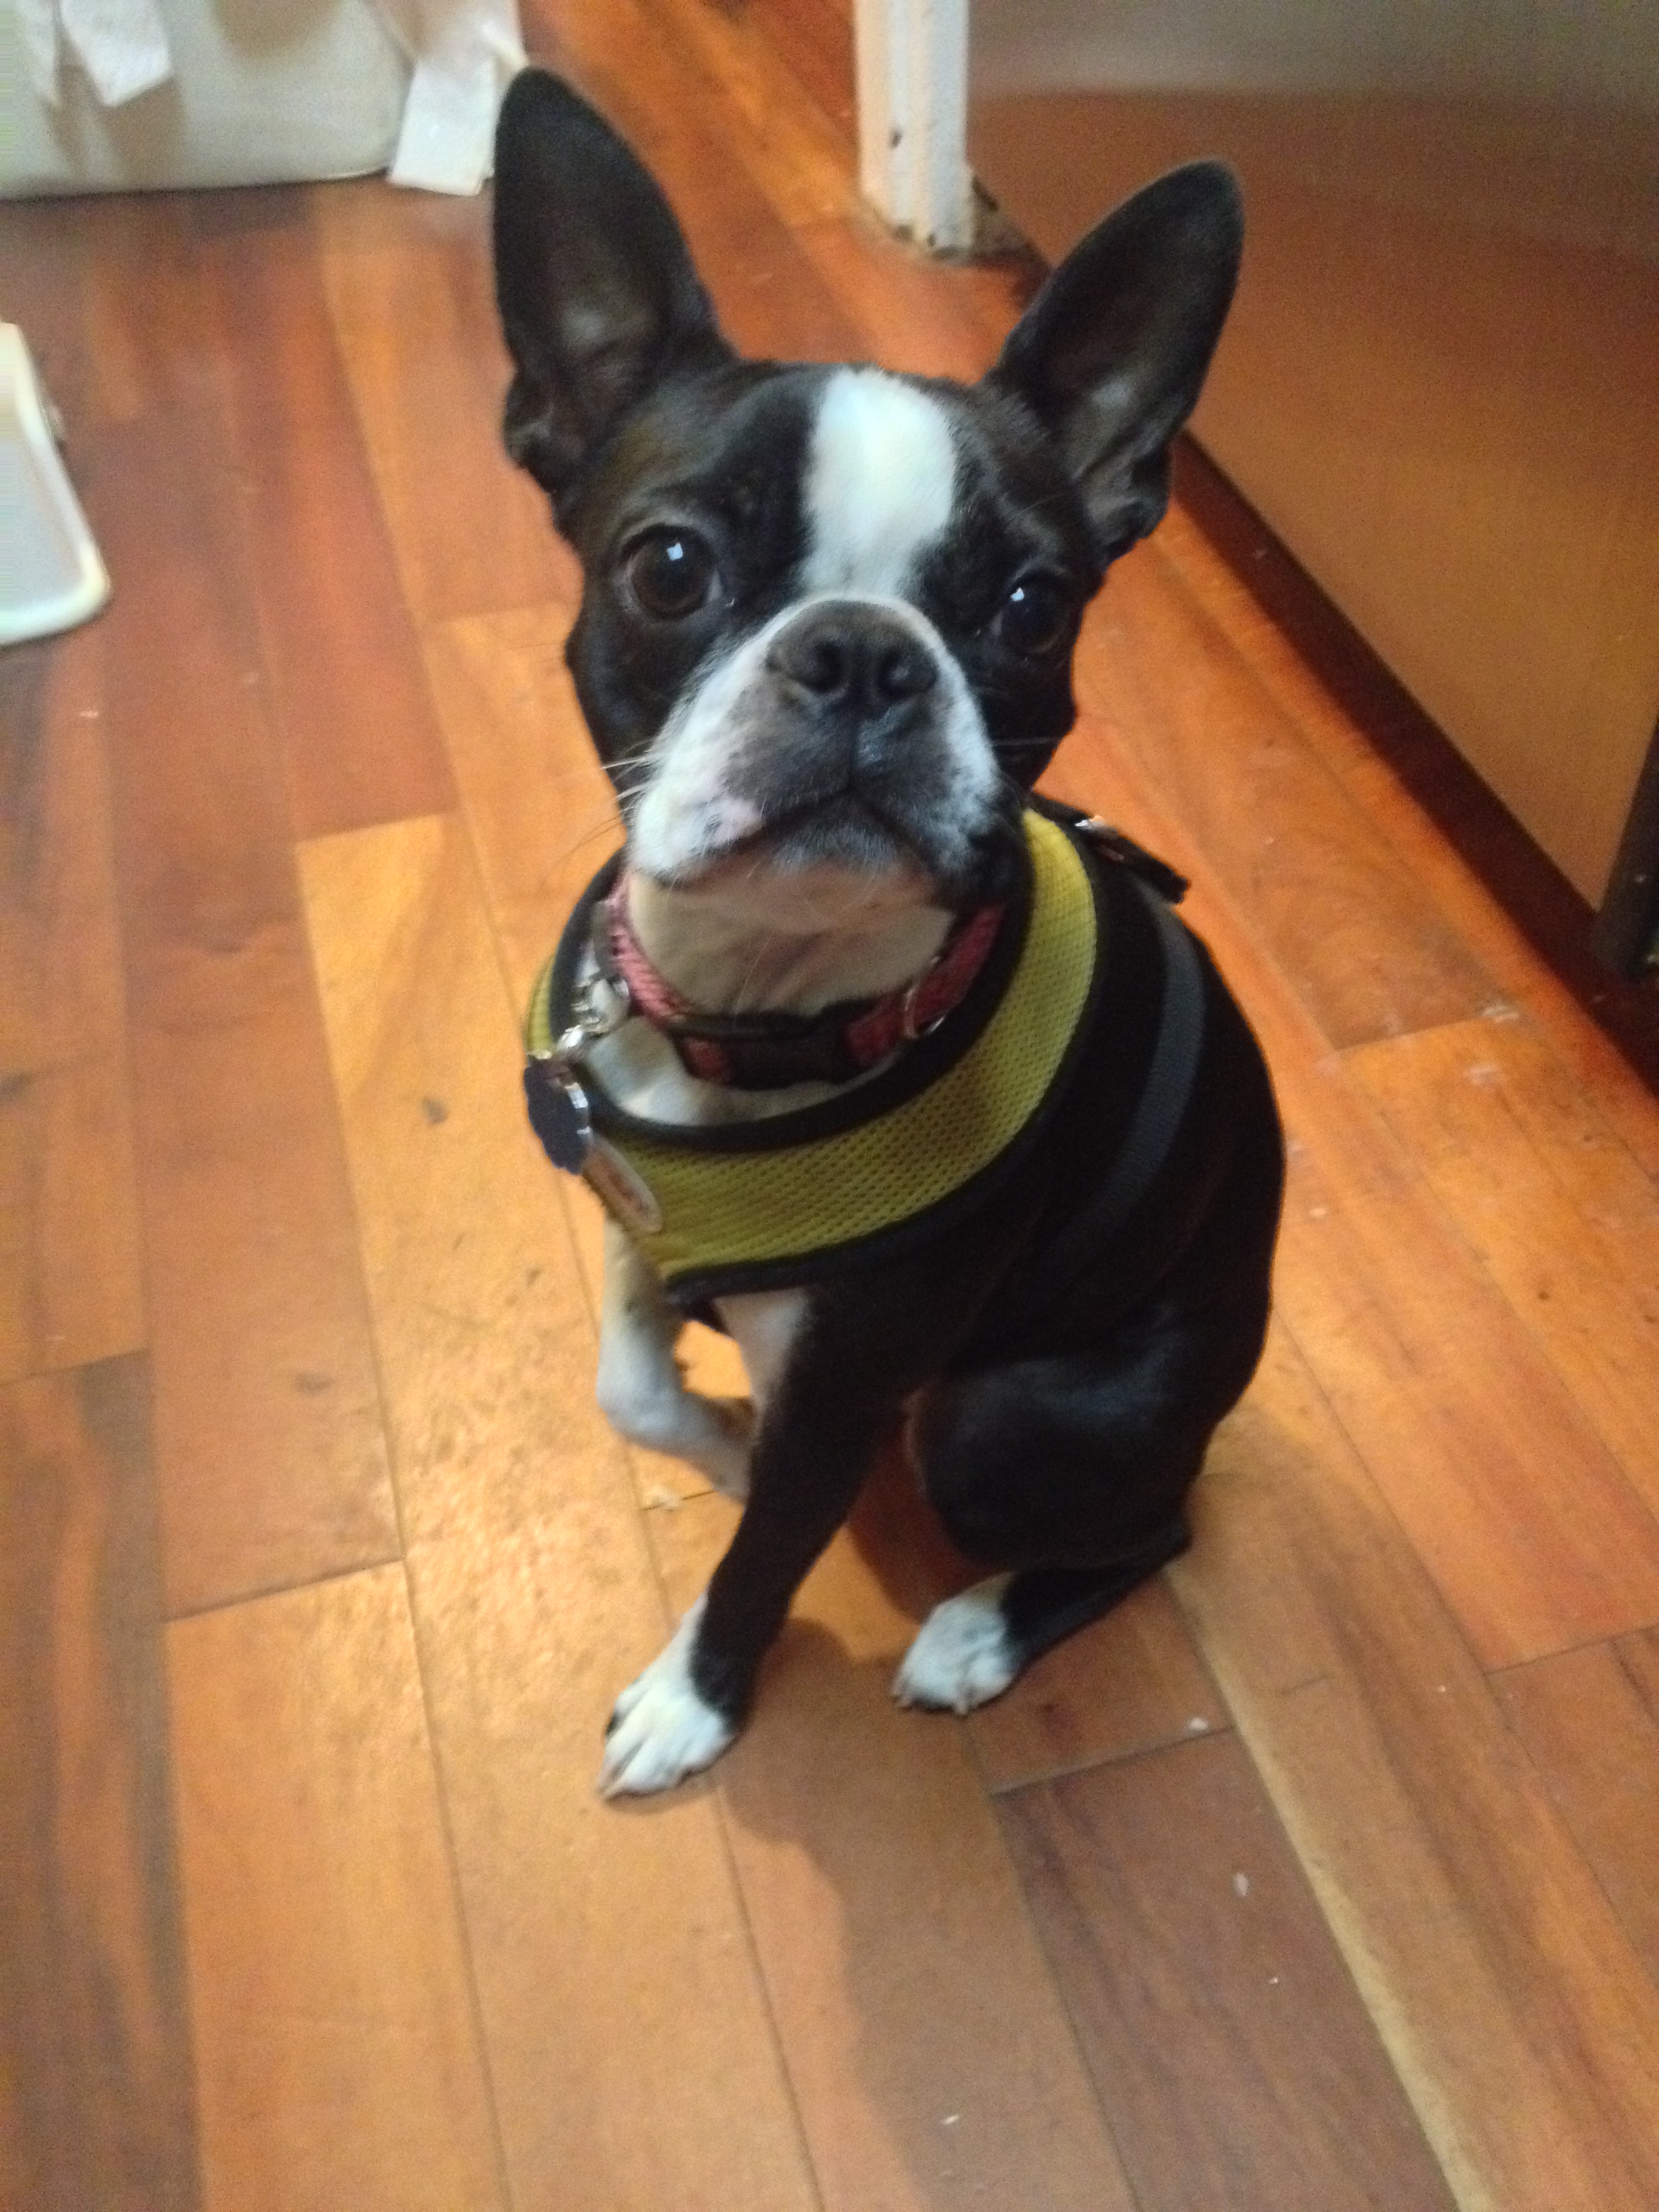
Pinta at 3 Weeks

Image

Pinta at 6 Months

Image

Pinta at 1 Year

Image

Bites & Pieces…Weekend Edition

I learned something this week; Brent enjoys the Bites & Pieces posts.  Well, in that case here we go.

Oooops, he and I don’t have much in common except that he’s a Democrat when it comes to social issues, and I’m pretty sure our food tastes will be as out of sync as our belief in the free market.

I’ve described myself as a grazer and I wasn’t kidding.  I offered up my kale and pine nut salad and he didn’t jump at the offer so I think I’ll offer up my prime rib, Yorkshire pudding and spinach soufflé instead.  I’d throw in my blueberry cheese cake but he’d probably have a heart attack and you guys would blame me for the loss of our Morning Report.

I only serve this meal once a year……… maybe, and I generally make a big salad to go with it so I can keep from starving to death while I watch everyone else inhale their dinner.

Prime Rib

Minimum 3 rib standing roast of quality, we buy prime.  The weight doesn’t matter and I’ve actually purchased a roast of only 2 ribs before and the recipe works.  You can have the butcher cut the bones away and reattach with string if you want.

Generously season the entire surface of roast.  We like a Monterey seasoning but you can use anything you want as long as it includes some salt.  Be creative.

Bring roast to room temperature and pre-heat oven to 375.  Place roast in roasting pan with a rack under it.  Put roast in oven, uncovered, and roast for 1 hour.  Turn oven off.

Leave roast in oven, with door closed until guests arrive or about 45 minutes before you want to serve dinner.  Do Not Open Oven Door and the roast must be in the oven for at least 2 hours after first roasting before you turn the oven on to finish.  It can stay in longer though.

Turn oven on to 375 and continue roasting; 35 minutes for rare, 45 minutes for medium or 55 minutes for well done.

I leave it in for 45 minutes and the outside pieces are medium and inside is medium rare.  Everyone around here says that’s perfect.

Serve with creamed horse radish sauce.  I used packaged au jus mix or brown/onion gravy for the meat and the Yorkshire pudding.  There won’t be enough drippings in the pan to make au jus or gravy generally.

Yorkshire Pudding (makes 12 muffins)

Ingredients:

1 cup milk

1 cup flour

6 eggs

1 tsp salt

Vegetable shortening

Directions:

Mix milk, flour, eggs and salt until well blended.  Refrigerate for at least two hours.

Spray muffin pan with Pam and put ¼ tsp of Crisco into each muffin tin.  Place pan in oven and heat in oven at 400 until Crisco is melted and quite hot.  Ladle cold liquid evenly between 12 muffins, quickly while pan is hot.  Bake at 400 for about 25-30 minutes until the Yorkshire is puffed up and brown.

Let muffins sit in the pan for about 5 minutes before removing as it’s easier to get them out.  Don’t skip the Crisco or spraying the pan.  They will fall as they cool but that’s normal.  There will still be little hollow places inside.

Spinach Souffle

Ingredients:

1 cube butter or margarine

6 eggs

6 tbs flour

2 boxes chopped frozen spinach (defrosted and drained well)

2 lbs. cottage cheese

½ lb. American cheese (cubed)

Combine all ingredients in a round and deep baking dish and bake for one hour at 350.

If you only have one oven (I actually have two) you can cook the spinach with the roast at 375 for a little less time.  While the roast and spinach sit put the Yorkshire in.

As I mentioned, this is not a light or diet friendly dinner so be warned, but our family and friends look forward to it every time I say “that’s what’s for dinner”.  It’s generally a holiday or special occasion meal.  If you want to cut back on the fat content, save the spinach for another meal and have green beans instead….hahaha

Bites & Pieces: Slow Squid

Squid has a lot going for it. The species grows rapidly and so is considered sustainable. It’s high in protein and low in fat. Well, at least until you bread it, deep fry it, and serve it with marinara sauce. As bar food goes, it’s a favorite of mine. The Carlyle in Shirlington has a particularly good version. My mother always has it when visiting town. One of the most interesting squid dishes I had was at the Green Street Grill in Cambridge, MA. It was made Provencal style with garlic and tomatoes. It was an eye opener and one of my favorite ways to make squid.

I wanted to do something different with the squid I bought at my favorite waterfront fish monger on Friday (Captain White’s). Squid can be tricky to cook as if you cook it for more than a minute or two, you may as well serve up a plate of rubber bands. There are various strategies to tenderize it, but it comes down to a fast cook. Turns out that squid shares a characteristics with some of my favorite cuts of beef. You can cook it fast, but you can also cook it slow. In the case of beef, the collagen gradually breaks down and a tough cut of meat becomes melt in your mouth tender. That didn’t happen with the squid, but it was tender and the recipe is easy enough for a weeknight meal.

I slightly adapted a recipe originally published in Gourmet, which can be found on the Epicurious web site.. NPR also has a story on slow cooked squid with some recipes that I plan to investigate in the near future.

The dish has a flavor I’ve never gotten out of squid before. I love linguini with clams or mussels for the flavor one gets out of the shellfish, but don’t really care for the meat. We served the dish over black rice. It’d be good with linguini as well. I think that one could add fennel or another root vegetable to the dish.

I adapted the Epicurious recipe slightly. The original recipe calls for cooking just the garlic and parsley, then adding the squid. I decided to cook some chopped onions with the parsley and then add the garlic. I used a can of chopped tomatoes; they suggested using whole tomatoes and chopping them. The original recipe calls for adding ¾ of a cup of wine and ¼ cup of water after adding the squid and simmering for 10 minutes to reduce the liquid. Then, add the tomatoes and simmer on the stove top for 45 minutes, stirring occasionally. I wanted to make this a simple dish, so I added the wine and tomatoes together, brought it up to a simmer, and then braised the dish in the oven.

[Edit: I forgot that I added a teaspoon or two of capers to the dish as I thought they would fit and, well, I love capers.]

I had two half pound squid bodies rather than the pound and a half, but it was plenty for us. I cut them up into half inch squares, then rinsed, dried and coated them with olive oil. I thought that would give me more even cooking at the onset. They were about a quarter inch thick, so made good meaty bites. This would work well with smaller squid and I would encourage you to use the tentacles. Octopus might be good in this dish as well.

Ingredients

1 ½ pounds of squid, cleaned
1/4 cup minced onions or shallots
1 bunch of parsley, finely chopped
1 cloves of garlic, finely chopped
¼ teaspoon of red pepper flakes (optional or use to taste)
½ cup of dry white wine
28 oz. can of chopped tomatoes

Method

Cut the squid bodies into pieces or rings. Combine with tentacles if you have them. Rinse and dry, then toss with olive oil to coat.

Once the squid is ready, it’s a good time to turn on the oven. I set mine at 350 degrees, but would probably use a lower temperature (perhaps 300) the next time.

Reserve 2 tablespoon of chopped parsley for garnish (which I forgot to use).

Heat about 2 tablespoons of olive oil in a heavy pot or dutch oven. Add the chopped onion and parsley and stir for a minute. Add garlic and stir for another minute. Create a small open space, pour in a little olive oil, and add the red chile flakes. Mix everything together and add the squid. Cook for a minute or two and then add the wine and tomatoes. Bring to a simmer over medium heat and then throw into the oven, uncovered. Cook until the water evaporates, about 45 minutes to an hour.

Remove from the oven and serve over pasta or rice. Garnish with parsley.

BB

Last Call for Twinkies

“Hostess Brands Says It Will Liquidate”

By MICHAEL J. DE LA MERCED
 

Bites and Pieces: Roll Those Oats

Oatmeal Oatmeal is my go to breakfast for the family. It cooks while I’m getting lunches or coffee ready, it’s happily eaten, and it’s a substantial breakfast. I tend to wake up about 20 – 30 minutes before the boys on school days, so that gives me enough time to make a basic oatmeal. I like to make it creamy, so I start it off cold and use half milk and half water.

Basic Oatmeal

1 cup rolled oats
1 cup milk
1 cup water
pinch of salt

Combine all ingredients and cook over medium heat, stirring occasionally until thick. Primo likes his sweetened with blueberries and pecans on top. Secondo just goes for maple syrup. I stir some maple syrup in before serving so that it’s not just on top (and a bit sweeter than Primo realizes). For Keen, I serve it in a low soup bowl with blueberries around the edge of the oatmeal, pecans sprinkled on top, maple syrup around the edges and a bit more on top.

Porridge

Better known here as steel cut or Irish oatmeal, this is worth the time. It takes the better part of an hour, so works if I’m a bit sleepless and wake up way too early. We tried a slow cooker recipe once, but didn’t like the results. To do it right, you have to take the time and stir it. It’s also good for a weekend breakfast if I don’t feel like making pancakes or waffles.

1 cup steel cut oats
~4 cups water (or 2 cups each of water and milk)
1/4 tsp. salt or to taste

Bring the liquid up to a near boil and gradually stir in the oats. Bring up to a simmer and cook, stirring occasionally, for about 30 – 40 minutes or until you get the consistency you like. I make mine thick and creamy.

Steel cut oats are variable. We generally buy ours from Trader Joe’s, which calls for a 4 to 1 ratio. I’ve seen higher and lower ratios and different cooking methods, so trust what’s on the box. The steelcut oats have a slightly nutty flavor to them and a bit more chew to the texture. Once made, I serve the oatmeal as with the regular kind. That is, until recently.

Oatmeal Brûlée

Doodles is a restaurant in Lexington, Kentucky, that specializes in breakfast. We stopped there on our last trip between DC and KC. One of their dishes is a bruleed steel cut oats. Basically, oatmeal with a sugar crust. I tried making it myself this weekend, as we’re at my parents and they don’t have maple syrup. Lacking a torch, I caramelized the sugar by heating it in a small pot until it melted and poured the syrup on top of the oatmeal. It worked beautifully. I figured I’d split a large bowl with Keen, but one of my sons became interested. Despite already having had a bowl of oatmeal, he polished off half the remainder.

Savory Oatmeal

For all that, you think I’d love oatmeal. Humphrey Bogart once summed up my feelings about hot breakfast cereals. If me and the boys wanted to eat mucilage, we would have ordered mucilage. I used to think it was an issue with texture, but that can’t be the case. I love risotto, which is Italian for mucilage. Then it hit me. It’s not the texture, but it’s sweetness combined with the texture. I started experimenting with savory oatmeal. I’ve haven’t had a chance to experiment much, but like what I’ve tried. For my first effort, I stirred in some leftover tomato sauce and some sriracha, then topped with grated parmesan cheese and a bit of fresh cracked pepper. Voila! Oatmeal that I enjoyed. Another effort is to mix in some chopped herbs and parseley and top with cheese. I think I’ll try bacon and eggs next. Break up crispy bacon and stir into oatmeal, top with a sunny side up egg. Perhaps a bit of cheddar cheese on top.

Savory oatmeal is not a terribly original concept. I’ve eaten something similar at Café Aurora, an Eritrean restaurant in Alexandria. GA’AT is an Eritrean porridge made from barley, bran, whole wheat flour lightly roasted porridge served with melted butter, spiced red pepper and side yogurt. Here’s a few other takes on the idea.

Olga Berman

Serious Eats

Mark Bittman

So, how do you roll with your oats?

BB

Bites and Pieces: Macaroni and Cheese

Comfort food doesn’t get any more comforting than macaroni and cheese. Millions of harried parents crack open a box of Kraft Mac & Cheese and have an easy dinner that they know will be gobbled. I once ran into a financial emergency in graduate school. I miscalculated my expenses and ran out of money before I ran out of month. [How quaint. Someone in his mid-20s without a credit card.] I sold a text book and made plans to eat mac & cheese for a week. Not content with boxes, I bought a pound of dry macraoni, a block of Velveeta, and a few additions such as a can of diced green chiles.

Fifteen years later, I was introduced to a better approach. My girlfriend’s room mate used to work at the New England Conservatory of music. There would often been left-over (good) cheese from receptions, which she would use to make the mac and cheese recipe from Best Recipe, a complication of favorites from Cooks Illustrated. Their recipe is adapted from John Thorne’s book Simple Cooking. I’ve been making a slightly tweaked version of it ever since.

Home made macaroni and cheese usually consists of pouring a Mornay sauce (white sauce with cheese) over cooked macaroni, possibly topped with toasted bread crumbs. Good, but not necessarily rich. I like rich. This one is akin to a custard, so it is thickened with eggs, not flour. Here is the base recipe:

Ingredients

2 large eggs

1 can of evaporated milk (or 1 ½ cups of milk)

½ teaspoon salt

¼ teaspoon ground pepper (black is fine, though white is nice for color)

¼ teaspoon hot sauce

1 teaspoon dried mustard, dissolved in 1 teaspoon of water

4 tablespoons unsalted butter, cut into pieces (half an inch or so is fine)

12 ounces sharp cheddar cheese, shredded

8 ounces of dry macaroni

Method

  1. Bring two quarts of water to a boil, add macroni and 1 teaspoon of salt. Cook until not quite done (it finishes cooking later).
  2. Meanwhile, whisk the eggs and combine with one cup of milk, salt, pepper, hot sauce and mustard. Shred the cheese.
  3. Pour macaroni into a colander to drain. Return to pot and toss with butter. Turn burn to medium and add the egg & milk mixture and 8 ounces of cheese. Stir until the cheese melts. Gradually add the remaining milk and cheese, stirring until the mixture thickens.
  4. Top with bread crumbs if you like. Did I forget to mention the bread crumbs?

The original recipe calls for evaporated milk, which makes a terrific sauce, but one very high in fat. I think whole milk works fine. You could probably use 2%, but I wouldn’t go lower in fat content. When I first used regular milk, my sauce took ages to thicken. I’ve found that I can obtain the right texture by undercooking the macaroni and stirring under medium high heat. You can also get away with dropping down to two or three tablespoons of butter. Don’t go underboard, though. CI later published a low fat version of the recipe, which just goes to prove that some things don’t work.

Variations

I’ve recently started varying the recipe a bit, mainly with the spicing. I was at my brother’s lake house in July and spotted some KC Masterpiece barbeque sauce. I replaced the spices with BBQ sauce to taste, probably about about a quarter cup. It was a hit. Another time, I tried using a teaspoon five spice powder instead of the mustard. It gave the dish a subtle twist.

The Competition

Post your favorite recipe in the comments section or email me and I’ll add it to the main post. Perhaps we can do a mac and cheese cook-off!

BB


Michigoose’s contributions:

Stove-Top Mac-n-Cheese

from Alton Brown

Ingredients

1/2 lb elbow macaroni

4 T butter

2 eggs

6 oz evaporated milk

1/2 t hot sauce (I like to use Cholulu Sauce)

1 t kosher salt

3/4 t dry mustard

10 oz sharp cheddar cheese, shredded (I usually use a mixture of cheeses here, much like FB’s girlfriend’s roommate)

In a large pot of boiling, salted water cook the pasta to al dente and drain.  return to the pot and melt in the butter.  Toss to coat.

Whisk together the eggs, milk, hot sauce, salt, pepper to taste and mustard.  Stir into the pasta and add the cheese.  Over low heat continue to stir until creamy, about 3 minutes.

Very, Very Bad for you Baked Macaroni and Cheese

from Giada De Laurentiis

Ingredients

12 oz wide egg noodles

2 cups heavy cream

2 1/2 cups whole milk

2 t flour

2 cups grated Fontina cheese (packed)

3/4 cup grated Parmesan cheese (packed)

3/4 cup shredded mozarella

4 oz pancetta, diced and cooked crisp

2 T Italian parsley, chopped

Italian bread crumbs

Preheat the oven to 450 degrees and butter a 13 x 9″ baking dish and set aside.

Cook the noodles until tender but still firm; drain well.  Whisk the cream, milk, and flour in a large bowl, then stir in half of each of the cheeses, the pancetta and the parsley.  Add the noodles and toss to coat.

Pour the noodle mixture into the prepared baking dish, sprinkle the remaining cheese over the top, then dust with bread crumbs.

Bake until the sauce bubbles and the cheese and crumbs on top begin to brown, about 20 minutes.  Let stand for 10 minutes before serving.

Michigoose’s Dad’s Macaroni and Cheese Supreme

I never actually got to eat mac and cheese when I was growing up unless it was at somebody else’s house.  My Dad had developed a serious aversion to it after he and my Mom had to eat it for weeks on end when they were first married and still poor college students.  After working on his own recipe for several years he finally developed one he could eat.  And like all my Dad’s recipe’s, it’s very, very involved!

Ingredients

1 cup macaroni, cooked and drained

1 1/2 T butter

1/2 small onion, chopped

1/2 cup mushrooms, sliced

1 T flour

3/4 cup skim milk

3/4 cup ham, fully cooked and cubed

1/4 t dry mustard

1 dash ground black pepper

1/4 t salt (he uses table salt, so adjust if you use something else)

1/2 t Worcestershire sauce

1 dash hot sauce (here he undoubtedly means Tabasco)

1/2 cup frozen peas, thawed

1/2 cup grated cheddar cheese

1/2 cup grated Swiss cheese

1/2 cup bread crumbs

2 T butter

2 T green pepper, chopped (I think he means a jalapeno here)

Heat oven to 375 degrees; cook macaroni to al dente, drain and set aside.

Melt butter over medium heat and saute onions until light golden in color.  Add the mushrooms and saute another 4 minutes.  Add the flour and cook, whisking continuously, for 1 minute.  Gradually add the milk, stirring constantly.  Bring to a boil and cook for 1 minute.  Remove from the heat.

Stir the ham, mustard, pepper,salt, Worcestershire sauce, hot sauce, peas and cheese into the milk mixture and stir until the cheese is melted.

Toss together the sauce and macaroni, then spoon into a buttered baking dish.  Bake covered for 20 minutes.  Uncover, dot the top of the casserole with the remaining 2 T of butter and cover with bread crumbs.  Bake another 10 minutes.

Garnish with the pepper and serve.


Bites & Pieces: ¡Ceviche!

Raw fish is eaten round the world. Sushi and sashimi from Japan, crudo and carpaccio from Italy, and Gravlax from Scandanavia to name a few. Hawaii has contributed poke, a kind of tuna tartare. I was first introduced to it at the Yardhouse in San Diego. The best I’ve ever had was at the East Coast Grill and Raw Bar. A friend of the owner had caught a tuna off Cape Cod the day before and so they were featuring it that night. Then there are the raw oysters that I happily slurp at Clyde’s for happy hour. Anything from Prince Edward Island is worth a taste.

Latin America’s contribution to the world of raw fish is ceviche. I was introduced to ceviche during my first visit to Costa Rica. My then girlfriend had never had a serious boyfriend before, so much of her family was curious about the gringo coming down for her brother’s wedding. My Spanish was minimal back then and I remember being reduced to saying ¡me encanta Costa Rica! as folks chatted with me at the end of the reception. All in all, a good trip. We were married one year later to the day.

Ceviche is distinct from sashimi, carpaccio or tartare in that the fish or shellfish is “cooked” in lime juice. Citric acid alters the chemical and physical properties of the proteins in the fish. This process of denaturation turns the flesh firm and opaque, as if it had been cooked with heat. One still needs to use high quality fish as the marinade is not the same as cooking. Then again, if I’m having a medium rare steak, it should be high quality meat.

For this post, my starter material is a book on ceviche from Guillermo Pernot. He had a great restaurant in Philadelphia (since closed) and is now with the group behind Cuba Libre. That’s a rum and coke with some lime juice.

Let’s start with basic ceviche. First, create the marinade. Half a cup of fresh lime juice, a quarter cup of orange juice, and 2 teaspoons of kosher salt. Fresh is key here, so juice them yourself. Next, cut up about a pound of fish into roughly quarter inch dice. Mahi mahi and red snapper are great choices. Tilapia is fine, if a bit bland. Let the fish marinate an hour or so and then add diced tomato, some minced onion or shallots, some minced cilanto, and some minced chiles (bell, jalapeño or Serrano peppers, depending upon your heat tolerance). If there’s something you think goes with this, enjoy! Serve with tortilla chips. Costa Ricans like to have a mix of ketchup and mayo on the side. I call it salsa tica and it’s good.

Shellfish is also good for making ceviche. If you’re worried about raw fish, parboil some prawns and cut them into small pieces. Shrimp cocktail from the South! Scallops make fantastic ceviche. Just toss whole bay scallops or sliced sea scallops into the marinade and let them sit for about 15 minutes.

Those are the basics. Now let’s get a bit fancy. I mentioned the Pernot book, which I should note is a gift of Natasha Bonilla, a family friend. The recipes are restaurant complicated, but I’ve tried a few at home and they rock. They’re also doable for the home cook. Here are a few of my favorites:

Hamachi Ceviche with Trio of Peppers Salad

This one looks great. There’s a fair amount of chopping involved, but it’s worth it. It’s terrific with an unoaked Chardonney. Heck, live a little and pick up a bottle of white Burgundy.

Citrus Dressing

½ cup fresh lemon juice

½ cup fresh lime juice

½ cup fresh orange juice

1 tablespoon sugar

2 tablespoons oil, infused with garlic*

2 tablespoons annatto oil*

2 teaspoons kosher salt

Combine all the ingredients in a blender until emulsified and set aside.

*I take whole cloves of garlic, mash them slightly with the edge of a knife, and put on the stove over low heat. Let it go for about 15 minutes and then strain. Annato seeds are used to color oil. Traditionally, it’s made the same way that I make the garlic oil. Put the seeds in oil and heat up until colored. For this recipe, I can simply do everything in one batch. You can also find annatto seed powder, which simplifies the whole process. If all this seems a bit too much bother, use a flavored oil or neutral salad oil.

Assembling the ceviche

¾ pound skinless hamachi, sliced thinly (yellow fin tuna)

1 large, evenly shaped red bell pepper

1 large, evenly shaped yellow bell pepper

1 large poblano chile

1 cup of arugula sprouts or thinly sliced arugula

½ red onion, sliced very thin and rinsed under cold water

Salt and pepper to taste

Combine the sliced fish with half the citrus dressing. Cover and refrigerate for 30 minutes.

Slice the top and bottom from the bell peppers. Cut open along one side and remove the seeds and the white membrane. [Pernot instructs one to remove the top layer of watery flesh from the inside as well, but I’d say that’s optional.] Slice each pepper into very thin strips—a mandoline is very helpful here. Do the same for the poblano chile.

Toss the peppers with the remaining citrus dressing. Lightly toss the fish, pepper mixture, arugula and red onion. Adjust the seasoning with salt and pepper. Arrange onto 6 chilled salad plates. [Oh, did I forget to mention that you were supposed to serve on chilled plates? Sorry about that.]

Bay Scallop Seviche with Blackened Tomatillo Truffle Sauce

This one will bring the house down. The ingredients are widely available and it is great for a crowd. Truffle oil is pricey, but a little goes a long ways. Trader Joe’s used to carry truffle oil, but no longer. I find it at World Market. Wine stores often carry some. For this dish, I think black truffle oil makes the most sense.

Let’s start with the plantain chips. You can buy them and they’re quite acceptable. Fresh is best, though. For this, you need green plantains. Cut off the ends, remove the skin and slice into planks. The best way I’ve found is to use a cheese slicer. It makes even plantain slices. Heat up a half inch or so of vegetable oil in a dutch oven or cast iron pan. Fry the slides and set them on paper towels to drain. Toss with a bit of salt.

Blackened Tomatillo Truffle Sauce

3 tablespoons extra virgin olive oil

½ pound fresh tomatillos, husks removed and rinsed

½ pound ripe plum tomatoes

1 red onion, quartered and unpeeled

4 cachucha* chiles

1 jalapeño chile

1 bunch fresh cilantro leaves

3 tablespoons truffle oil

salt & pepper to taste

There are two ways to cook the tomatillos, tomatoes, onion and chiles. Pernot does it on the stove top. Heat a tablespoon of olive oil over med high and add the tomatillos, tomatoes, onion and chiles. Cook, tossing frequently, until the skins are blackened. I like to toss them all with the olive oil and use our toaster oven. I preheat it to 350, put the veggies on a tray, and then move it to broil until the skins blacken (about 10 minutes).

Once cooked, put them in a food processor and cool to room temperature. Add the cilantro and pulse briefly until the vegetables are chopped but still chunky. You can also put everything through a meat grinder. Finally, add the remaining ingredients, taste to check seasoning, and refrigerate.

*I don’t know where to get these either. It’s a native Cuban pepper that looks like a habañero, but has much less heat. I’m fond of Serrano peppers, so I just use 4 of them and skip the jalapeño. If you prefer to keep heat levels down, just use jalapeños.

Bay Scallop Ceviche

1 cup fresh lime juice

¼ cup fresh orange juice

3 tablespoons finely diced red onion (or a lg. shallot)

1 tablespoon kosher (or sea) sallt

1 pound fresh bay scallops

Combine everything but the scallops in a nonreactive (stainless steel or enameled) bowl. Add the scallops and toss to combine. Cover and refrigerator for 24 hours.

Drain the marinade from the scallops and discard. Combine the scallops with most of the sauce and refrigerate for at least 20 minutes. When ready to serve, drain the excess liquid and add the rest of the sauce. A great way to serve this is to put the ceviche onto spoons and top with some crumbled plantain chips. Serve accompanied with plantain chips.

Tuna Ceviche with Roasted Calabaza

This is a three level ceviche. The base is roasted calabaza, a squash. You can use butternut squash for this and do well. On top of the squash is a layer of tuna. You’ll want high quality stuff for this. When I can get bluefin tuna, this is what I make. Thie dish is topped with a peppercress salad (watercress works just fine).

OK. For the base. Have one pound of calabaza (or butternut squash), peeled and cut into half inch cubes. Seasons with salt and p\epper and toss with olive oil. Roast in an oven at 425 degrees for 15 to 20 minutes, shakng and tossing once or twice, until it’s browned and crusty on the outside. Remove from the oven, cover and chill.

Now the salad. Combine half a pound of peppercress (or watercress) leaves with a quarter cup each of lemon and lime juice, a tablespoon of pumpkin seed oil (you can find it at World Market), and some salt and pepper. I’d use a high quality nut oil as the first alternative and good EVOO as the second.

Last, the good stuff. Make an emulsion of a quarter cup each of olive oil, lemon juice, and lime juice, 2 tablespoons of pumpkin seed oil (or nut oil or more olive oil,. Reserve a quarter cup of this. To the rest, add a pound of diced, sushi grade ahi tuna. Season with salt and pepper to taste. I go light on salt and a bit heavy on pepper. The recipe calls for a quarter cup of pepitas, which can be found in Latin American markets.

Let’s put it all together. It helps to have a ring mold to do this. Make a half inch thick base of roasted squash, Put on top of this another half inch of the marinated tuna. Top with the salald and a bit of reserved emulsion.

It’s a fantastic fall dish.

Bites and Pieces: FroYo Ho Ho

Hi all,

I’ve been fairly quiet, mainly due to a change in my commute. Replacing a 20 – 25 minute drive with a 65 – 70 minute bike ride has been fun, but pretty much left me with no spare energy but to make dinner, watch a bit of TV or a movie, and go to bed.

WIth the summer heat in full swing, I thought I’d post a summertime recipe. Frozen yogurt places have been popping up like summer dandelions. Nearly all the pleasure of ice cream and half the guilt. A Crave popped up in the shopping center next to my place. It’s fun, but can be expensive. So, we (well, my wife) picked up an ice cream maker at Costco. It ran a bit over $30 and has already paid for itself.

You can find many ice cream and frozen yogurt recipes on line, so there’s no need to go into all that. Last week, I heard a story on NPR’s The Splendid Table about how to make frozen yogurt. Jeni Bauer owns a number of ice cream shops in Ohio and wrote a book on making ice cream and frozen yogurt with home equipment. She bought a few home ice cream makers and experimented until she found a way to produce great ice cream. I’ve liked the FroYo we’ve made at home, but this stuff takes it to another level.

There are a couple of tricks to her method. First, bring the milk and sugar up to a boil and add a cornstarch slurry. Boil for a minute longer until it thickens. Second, add this mixture to two ounces of whisked cream cheese. Add the yogurt and flavorings to this base and chill in an ice water bath before using the ice cream maker.

The recipe published on Splendid Table is a lemon frozen yogurt. I modified Jeni’s recipe slightly. Hers calls for putting a quart of yogurt in a sieve, letting it drain for 6 – 8 hours, and then using 1 1/4 cups of the drained yogurt. We keep Greek yogurt at home and I think that works just fine. The original recipe calls for including the lemon zest in the main mixture and picking it out. Such a pain! I’ve long made lemonade syrup by boiling lemon juice, sugar, and lemon zest. The original recipe called for 3/4 cup of sugar and 1/4 cup of corn sugar. We don’t keep corn syrup around at home, so I omit the corn syrup and used a bit more sugar in the lemon syrup.

Lemon Frozen Yogurt

Excerpted from Jeni’s Splendid Ice Creams at Homeby Jeni Britton Bauer. (Artisan Books, 2011)

Lemon Syrup

  • 2 – 3 lemons (sufficient for 1/2 cup of juice)
  • 1/3 cup sugar
  • Zest from 1 lemon (or all if you like)

Yogurt Base

  • 2 – 3 cups of plain Greek yogurt
  • 1 1/2 cups whole milk
  • 1/2 cup heavy cream (or omit cream and use two cups milk)
  • 2 ounces (4 tablespoons) cream cheese, softened
  • 2 tablespoons cornstarch
  • 5/6 cup sugar

Method

Remove zest from one lemon in strips. Juice lemons to make 1/2 cup of lemon juice. Combine zest, lemon juice, and sugar in small sauce pan and bring to a boil. Set aside.

Whisk cream cheese in medium bowl until smooth.

Add two tablespoons of milk to the corn starch and mix to make a slurry. A fork is fine for this.

Combine remaining milk, cream, and sugar in 4 quart nonstick pot and bring to a boil. Boil for about 4 minutes, stirring, then whisk in the cornstarch slurry. Cook until the mixture thickens, about one minute. Stir the mixture into the cream cheese and whisk until smooth. Add the yogurt and lemon syrup (after straining out the zest) and chill in an ice water bath. [I used nested bowls, but you could also pour the mixture into a freezer bag.] Put in the cannister of the ice cream maker and spin until thick and smooth. Pour into a container, cover the surface with wax or parchment paper, and freeze for at least four hours to set up.

Chocolate Frozen Yogurt

Chocolate Syrup

  • 1/3 cup cocoa powder
  • 1/2 cup sugar
  • 1/4 cup water

Yogurt Base

  • 1 quart of plain Greek yogurt
  • 1 1/2 cups whole milk
  • 1/2 cup heavy cream (or omit cream and use two cups milk)
  • 2 ounces (4 tablespoons) cream cheese, softened
  • 2 tablespoons cornstarch
  • 1/2 cup sugar

Method

Combine cocoa powder, sugar, and waterin small sauce pan and bring to a boil. Whisk smooth and set aside.

Whisk cream cheese in medium bowl until smooth.

Add two tablespoons of milk to the corn starch and mix to make a slurry. A fork is fine for this.

Combine remaining milk, cream, and sugar in 4 quart nonstick pot and bring to a boil. Boil for about 4 minutes, stirring, then whisk in the cornstarch slurry. Cook until the mixture thickens, about one minute. Stir the mixture into the cream cheese and whisk until smooth. Add the yogurt and chocolate syrup and chill in an ice water bath. Put in the cannister of the ice cream maker and spin until thick and smooth. Pour into a container, cover the surface with wax or parchment paper, and freeze for at least four hours to set up.

Bites and Pieces: Chawanmushi (or what to do when you have a cook book with ridiculously complicated recipes)

We have a few cookbooks written by chefs. We bought The Figs Table, by Todd English, with some of our wedding money. I haven’t made much from it, though the olive oil & basil emulsion is a lovely addition to many recipes. Pesto without pine nuts. Some years later, a friend of ours gave us a cookbook on ceviche by Guillermo Pernot, the chef of Passión in Philadelphia. Last Christmas, my parents gave us the Bluestem cookbook, by the chef/owners (Colby and Megan Garrelts) of my favorite restaurant in Kansas City. The level of cooking there matches anything I’ve had in NYC/DC/SF.

A frequent problem that arises for me with recipes in such books is a combination of difficult to find ingredients and complicated recipes. Something along the lines of making two cups of basil emulsion of which you will use two tablespoons. That’s great for a menu for which you’ll serve 100 plates. Not so good if you’re left with 1 3/4 cups of basil emulsion. I tend to go out to restaurants where they make something I don’t have the time or skill to make and these cookbooks drive that philosophy home. Tom Sietsema’s recent review of high end steak houses drives that point home. It doesn’t take great skill to cook a great steak. Cassoulet is something else entirely.

Fortunately, there are the occasional gems that you can make at home without tying up your kitchen for a day. Tonight’s offering is one such recipe. It’s a light custard based on dashi stock. Dashi is the basis for miso soup. You can find powdered dashi stock at Asian markets, though the real thing is pretty easy to make. What caught my eye was that I had the ingredients on hand and it looked promising.

Chanwanmusi, hon shimeji, scallion dashi

Heat an oven to 275 degrees.

Dashi stock

1 ounce kombu (dried kelp)

4 cups water

~18 grams bonito flaks

Rinse the kombu under water and cut a few slits into it to release the flavor. Add to the water and bring to a boil. Turn off the heat, remove the kombu, and add the bonito folakes. Let steep for a minute or two until the bonito sinks to the bottom. Strain the stock and set aside. [Note: you can find freeze dried dashi stock and skip this.]

Chawanmushi broth

Combine 2 ½ cups of the dashi with 1 tablespoon of soy sauce, 1 tablespoon of mirin, ½ tsp. of rice wine vinegar, and 3 large eggs. Mix at low speed in a food processor or whisk together. Divide evenly among 4 small bowls and cover tightly with plastic wrap. Place the bowls in a casserole dish with one inch of water. [Note: I was a bit nervous about this, but the plastic won’t burn if you’ve plenty of water.] Put the casserole dish with the bowls of chawanmushi in the oven for about 40 minutes. The custard should be just set—a little jiggly in the middle, but firm overall. This is a light custard, so don’t sweat it.

Meanwhile, slice up a few mushrooms and sauté in sesame oil. Well, or butter, because let’s face it. Butter and mushrooms are a transcendent combination. If there’s anything else you want to use as a garnish, go for it. Combine the remaining dashi with soy sauce, rice wine vinegar, and mirin (about 1 tablespoon of each).

Putting it all together

Take the custards out of the oven. Pour a couple of tablespoons of the spiked dashi over the top, top with the mushrooms (and whatever else you want) and serve. This is a five star dish without that much effort. My guess is that you could get away with using chicken stock in place of the dashi and still have a stunner of a dish.

BB

Bites and Pieces: Perfect Chicken

I’ve mostly been on the road this week. My sons finished kindergarten (yay!) on Wednesday, which happens to be the day that my wife was starting a week long job for the US Forest Service. I’m transferring to a new job in July, so a family break seemed warranted.

I found a surprise along the way. There’s a pretty decent Italian place in Lewisburg, WV, of all places (Giovanni’s). I ordered lasagna for Secondo, pasta with greens and sausage for Primo (he’s on a health kick), and a roasted veggie salad for myself. I figured I could hoover up what they left behind. Well, the salad was terrific. A good balance of veggies and the roasted squash really added heart. The pasta and greens didn’t look like much, but looks can be deceiving. They used broccoli rabe for the greens and a mild sausage that balanced the dish. The pasta was penne and cooked al dente. The lasagna was simple–a couple layers of noodles with ricotta in the middle and marinara on top. I took a bite of it and got a surprise. The noodles were tender and the ricotta is as good as anything I picked up at the Italian Store in Arlington. Turns out they make everything in house. This is the kind of restaurant everyone wishes they had in their neighborhood. The total was $37, including two sodas.

But that’s not important right now. I’m writing about chicken. The day after I arrived at the lake, my brother made a beer can chicken. I’d never tried it before. It was quite good, but he misjudged the timing (we didn’t have a thermometer) and so the inner portions were undercooked. That’s the eternal problem with roasting a chicken. Undercooked meat or dried out breast meat (or in the worst of all cases, both). How to solve it?

One of my sons was wanting chicken and I know my parents enjoy it. So, what to do? On a whim, I decided to try a butterflied chicken. Cut out the backbone, flatten the thing, and roast it. As a bonus, you can use the wings and the back to make a nice mini batch of stock. I did a bit of hunting about and came upon Kenji Alt’s blog. He used to appear on America’s Test Kitchen. The method seemed straightforward and dispensed with turning the chicken. The ideal is 150 degrees for breast meat and 170 for dark meat. I was shocked when the meat thermometer registered the perfect temperature both times. And the chicken was perfect! 

1. Preheat the oven to 400 degrees.

2. Take a 3 1/2 – 4 lb. chicken. Brine it if you like (I do) and air dry. Cut out the backbone with some kitchen shears. Flatten the beastie. Spread a tablespoon of vegetable oil (sesame oil is tasty) over the top and season with salt and pepper. I shoved a couple tablespoons of butter between the skin of the breasts and the meat. It may be gilding the lily, but what the hey.

3. Slide up a half dozen small (1″) potatoes. Toss with oil and put in the bottom of a roasting pan. Put a flat rack on top and place the chicken on it. [Note: don’t use a V-rack for a butterflied bird. If you don’t have a flat rack, just put it right on the potatoes.]

4. Roast the bird for about 45 minutes, until the breast meat registers 150 degrees and the thigh registers 170 degrees. As I noted above, it worked perfectly for me.

5. Let the bird rest for 5 minutes and then enjoy!


BB

%d bloggers like this: